Wednesday, October 24, 2012

A Diamond in the Rough...

It's official!

My husband and I just purchased a little cottage near the beach.  We are very excited, but we have a lot of work ahead of us.  First thing to tackle is all the knotty pine paneling.  

Over the next few weeks I will be sharing how you can accomplish painting paneling the right way and just what that entails.  

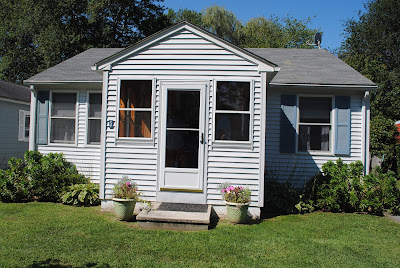
Here's a look at the house by the water--


As you walk into the house, the first room is a mudroom complete with a built in storage bench.  

The kitchen will be gutted and replaced with beautiful cabinets and granite.

The ceilings are a keeper!

Beach livin' is all-right with me!


Did I mention we have to paint 5 rooms of knotty pine??!!
I chose Chantilly lace by Benjamin Moore and I can't wait to show you the progress!

We'll take it!  
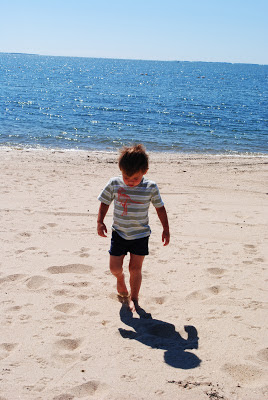
The little man approves.

We are looking forward to many years of fun spending time with our family and friends.  


To follow our progress and share my posts, join me on Facebook.


And as always, I love to hear from MY READERS!  Please leave me comments, post projects you have tried and feel free to ask me questions.


From my HOUSE to your HOUSE, HAPPY HUNTING!

Holly


If you enjoy reading HOUSE by Holly, please click the "like" button at the top of the page for Facebook. Or visit http://www.facebook.com/HouseByHolly and hit "like".  I will be sharing extra tips and tricks on that Facebook page I created.  And as always, I love to hear from MY READERS!  Please leave me comments, post projects you have tried and feel free to ask me questions.


Monday, October 22, 2012

Homemade by Holly

Giddy-Up, Birthday Girl!


When my daughter said she wanted to ride horses for her birthday this year, it all sounded so good.  I quickly got right to work, checking my favorite "go to"--Pinterest.  
(Don't you just love Pinterest?!)

I got some great ideas for a Horse themed party and came up with a few ideas of my own.  

The inspiration was endless.  
Google Image Result for http://goodell.smugmug.com/Hobbies/Baked-Goods/i-JhpRFJT/0/M/adobeols-M.jpg
Horse Cupcakes

How to make carrot party favors...cute for Easter, horse, farm parties
Carrot Party Favors

Horse party
Using Play Horses

chalkboard
Chalkboard Paint Platter

So these ideas were a great starting point and now I had to put my own spin on them. 


First up, those beautiful cupcakes-

 Now,  I would love to trace a silhouette of a horse on wax paper with melted chocolate in a icing bag, but that's just NOT going to happen. Tracing some 30 + said chocolate horses...yeah right.   

My spin includes vanilla cupcakes, light pink frosting dusted with a pinch of coconut topped with a mini plastic horse.  I decided to mix in some store bought chocolate cupcakes for interest.


Party Favors-

The carrot party favor with the surprise swizzle stick lollipop is no doubt adorable.  I happened to have orange and light green  tissue paper on hand and decided to try that instead of the the napkin and tulle.  

The end result:  just as adorable tied with a grosgrain ribbon

I ransacked the house for all the kids play horses and some mason jars.  Nice little touches for easy decorations....


Embellishing the Mason jars with grosgrain ribbon gave just the little touch the jars needed.  

Look how cute that Parmesan shaker is!
  
I absolutely love the silver platter with chalkboard paint and I could see this being used for multiple occasions.  
Placed on a  small plate easel it speaks to your guests...

And heck, while I got the chalkboard paint out, I can think of a few other things I'd like to paint.  Place card holders and gift tags all became my subjects, for my words.  
What says an outside Fall party more than apple cider and apple cider doughnuts? 
That's a given... 

I placed the drink dispenser on a plant stand and it was a perfect fit.  
Bonus:  the lower tray is a place to hold the cups!


With a little bit of imagination, some inspiration and a little bit of homemade, you can have a party any little girl would love.

Happy 6th Birthday My Darling Hannah Ryan!


And some highlights from the day...


And don't forget the horse pinata...

He didn't last long after this "crew" got to him!


To follow my projects and share my posts, join me on Facebook.


And as always, I love to hear from MY READERS!  Please leave me comments, post projects you have tried and feel free to ask me questions.


From my HOUSE to your HOUSE, HAPPY HUNTING!

Holly


If you enjoy reading HOUSE by Holly, please click the "like" button at the top of the page for Facebook. Or visit http://www.facebook.com/HouseByHolly and hit "like".  I will be sharing extra tips and tricks on that Facebook page I created.  And as always, I love to hear from MY READERS!  Please leave me comments, post projects you have tried and feel free to ask me questions.


Linking to:
Savvy Southern Style
The Shabby Nest


Wednesday, October 3, 2012

Two OLD Pieces, Two NEW Ways...


Hello, Hello People!


Today I have a little inspiration for all those people who want to recover an ottoman, but are afraid to try.  You can do it and it can look like this...


Ooooo...Ahhhhh...look at that nailhead trim!

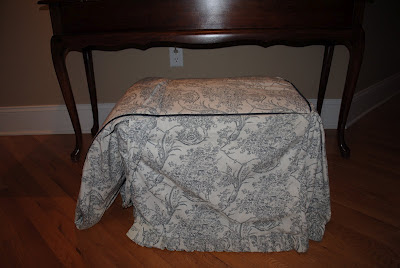
This glider ottoman was a gift from my Uncle when my daughter was born. I propped my tired feet on it every day rocking my babies to sleep for the last 6 years. 

The kids have gotten bigger and their rooms have gotten smaller, so I have no need for a gliding rocker or gliding ottoman, for that matter. 

Since it's a "gliding" ottoman, I tied a string around the hardware where the glider glides on all four sides.  This made the ottoman stable.  You could use zip ties too...

Looking through a bin of fabric, I found an old padded chair cover with a navy and cream toile pattern.   I instantly had a brilliant idea...

I guess you could say I was a little LAZY...I could drag out my sewing machine, make the piping, sew it to another fabric of choice, but I really liked the idea of getting the look without all the work...


The chair cover had just enough padding already, and some great piping too. The skirt also happens to go all the way around the chair...

Are you thinking, what I'm thinking? :)

Place the seat of the cover over the top of the ottoman and cut about 3 inches down and all around the chair. (You will pin the skirt back on in a minute.)

When you get to the part that goes over the "back" of the chair, pull or rip the piping off, but do not cut it.  

Cut the "back" off 3 inches down and take out the padding.

view of the side with the "back" part

Place the piping back across the top and hot glue or sew back to the chair.  (The piping will lay right on top of the seam of where the "back" part started.) 

Staple all 4 sides of the fabric tightly to the ottoman.

Are YOU with me, yet?

Last, staple the skirt back on  and add a little nailhead trim to kick it up a notch.  


You can buy a roll of nailhead trim for about $20.  I like the "rope" where you hammer a nail in every 5th hole or so.  It makes it soooo much easier.

What do you think about my NEW Ottoman?


Some other SUPER EASY Nailhead upholster projects:
Here's my reupholstered Craigslist chair for $35!


mini mudroom makeover inspired this chair project for the foyer.  


What do you say? Are you gonna try it? 
Or am I gonna have to come over and do it for you? :)


To follow my projects and share my posts, join me on Facebook.


And as always, I love to hear from MY READERS!  Please leave me comments, post projects you have tried and feel free to ask me questions.


From my HOUSE to your HOUSE, HAPPY HUNTING!

Holly


If you enjoy reading HOUSE by Holly, please click the "like" button at the top of the page for Facebook. Or visit http://www.facebook.com/HouseByHolly and hit "like".  I will be sharing extra tips and tricks on that Facebook page I created.  And as always, I love to hear from MY READERS!  Please leave me comments, post projects you have tried and feel free to ask me questions.

Linking to: