Calling all DECK-HAND'S!
The minute I found out I was pregnant with my little boy, I just KNEW he was going to have the perfect little NAUTICAL ROOM. It may have taken a while to get it here, but here it is...
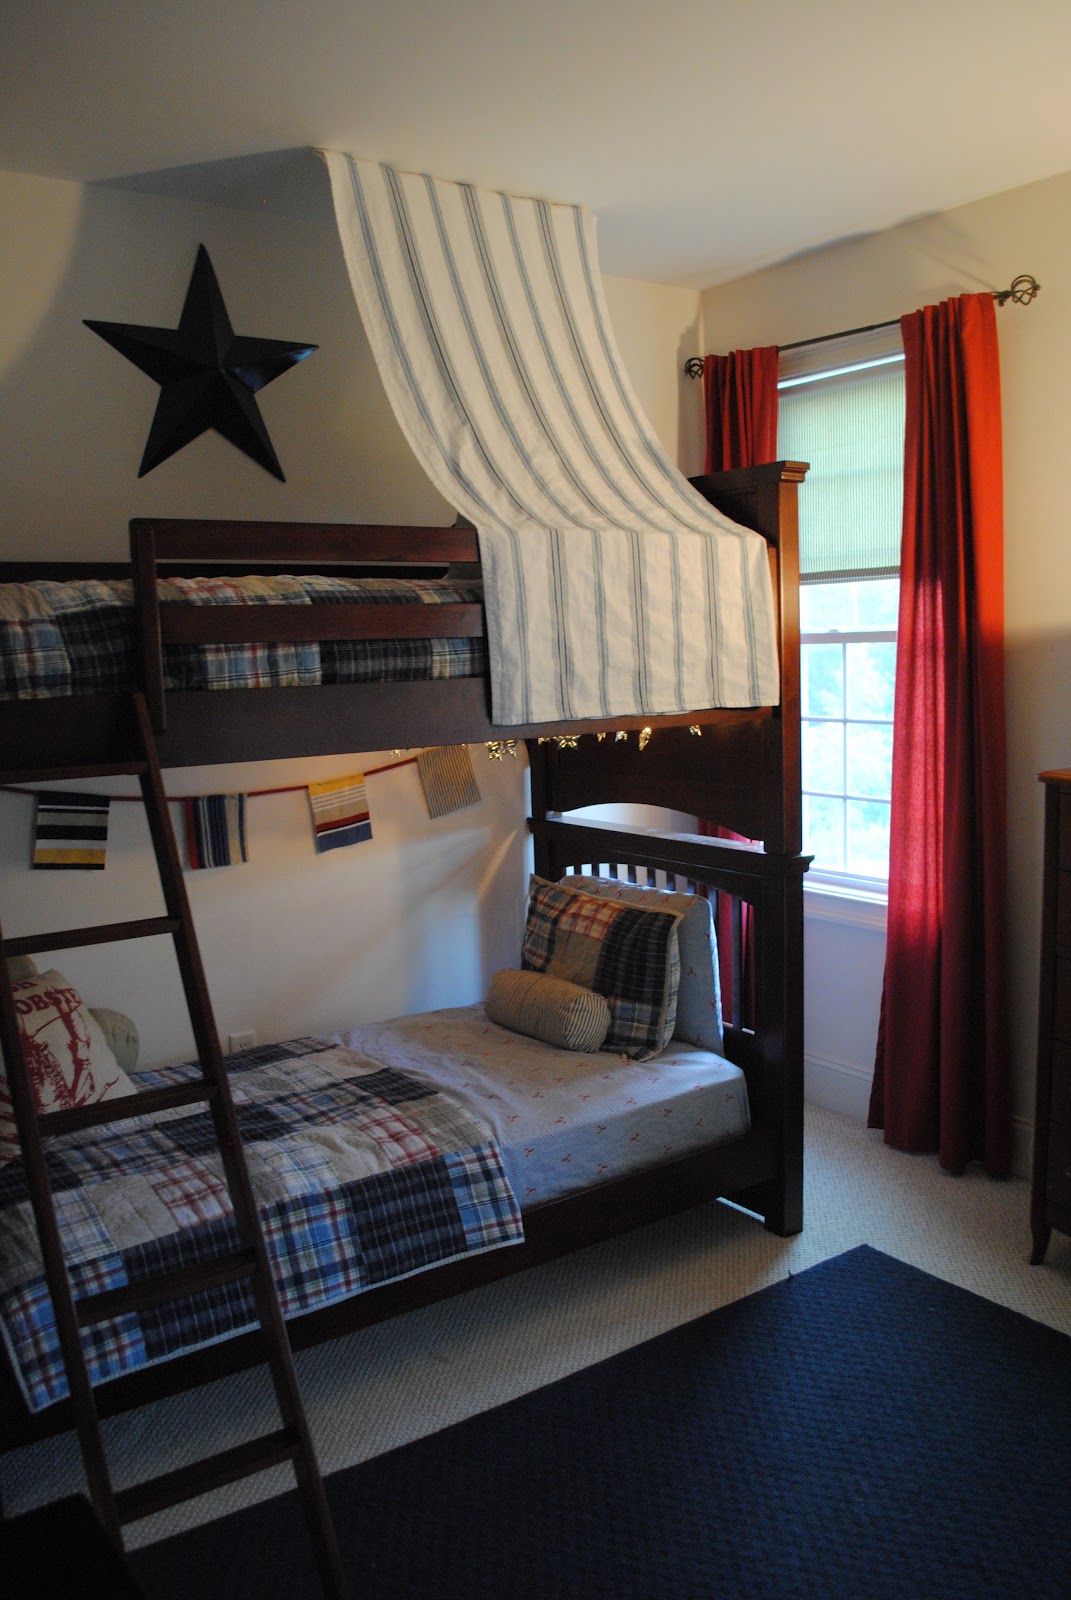
Hayden's room is small, bunk beds were our only choice to maximize the space. When you can't go wide you go high...
AND what could be more fun than BUNK BEDS?!
A super cool fort and lights above the bottom bunk make it so much fun!
A few NAUTICAL accessories and we are in business!
NAUTICAL ARTWORK
I found two cork boards at Walmart for $5 each. One works as it's intended purpose as a corkboard the other turned on the wrong side, painted with chalkboard paint--a chalkboard.
Not bad for $10! These bobbers make a statement--I slipped a few bobbers through some twine and glued some mini bobbers to thumb tacts.
I found this precious picture years ago and I still love it. A boy and his best friend!
Some scrapbook paper and a picture of the LITTLE SQUIRT on the beach is simple and goes with the theme.
I literally took this flag from the front yard, ripped it off the stick and framed it! Super easy and cheap art...
An oar and a nautical basket complete with a lobster are some thrifty finds for dollars.
TOY STORAGE
Toys can be overwhelming. Check out my
Just For Kids Tab for some great tips on corralling kids stuff.
Since Hayden's room is small, I had to come up with some extra storage to keep sane. A white cube 9 slot cubby is great for displaying his toys and keeping it tidy. The white cube came from the toy room I dismantled and turned into my office--NO SHE DIDN'T! If you want to see what toy torture looks like click
here.
Boys have a lot of tracks, trains, hotwheel loops, airports, dragons and other stuff that takes up a lot of space. Hayden doesn't play with ALL of them all the time, so I found these rubber baskets and small canvas bins to hold back the bits and pieces. We take one or two tracks down a week. That way he doesn't get bored.
Neatly, neatly....everything in place...
By the way-- What am I doing to my child? Could you imagine if you had to live in a room with a bunch of these scary things looking at you all the time? I might flinch every time I dress myself...
Turn a bookcase into a workhorse. The top shelves are for books (that won't get pulled down!) and the bottom is for bins. That equals a quick clean-up and sanity in my house.
Just a reminder-- if you have any tall pieces of furniture in your house, they should be bolted to the wall. The kits are very inexpensive and save lives. It only takes seconds for a child to climb a tall piece of furniture to get something up high. Click
here for the kit I use at my house.
Also, bunk beds are dangerous. They are not recommended for children under 6. I do remove our ladder and keep it hidden at all times. Only with adult supervision is Hayden allowed on the top bunk.
AMBIANCE
Who doesn't love a strand of lights? These metal star lights were perfect and I tucked them here and there using the slats of the upper bed.
So magical at night for my LITTLE SAILOR!
NAUTICAL FLAGS
I used a red rope I had on hand and cut 5x4 squares from Hayden's old crib skirt. You just fold the top of the square over the rope and sew.
FORT
This old shower curtain was taking up space in my linen closet. I do sometimes use it as a table cloth when we entertain outside, but I could totally see it in Hayden's Crab Shack.
WINDOW TREATMENTS
These panels are a Sailcloth panel from Pottery Barn and I made the roller shades.
Roller shades are a cinch to make-- If you know how to sew a seam, you can do it.
You will need:
Roller shade with your window measurements from discount store ($7)
Hardware to hang the shade with ($3)
Lightweight material
- You literally just rip off the plastic shade that the roller shade comes with.
- Measure the length and width of your window and cut your fabric with those measurements adding 1 inch to each side and 4 inches for the top (the one that you will need to slip through the roller shade) and 1 inch for the bottom.
- Iron your fabric and sew with those allowances.
- Slip the roller shade through the top "loop", install the hardware to hang the roller shade and P-R-E-S-T-O!
You got a custom made roller shade! Do ya follow?
Follow the instructions on the roller shade and roll the "shade" by hand, hang and pull a few times. I had to mess with mine a little...
Perfect for my little boy who loves the BEACH!
Bunk Bed are from Raymour & Flannigan $800
Bedding $200
Total
$1,000
My inexpensive HUNTED TREASURES--
Globes $15 (one was mine as a kid, the other $15 from discount chain)
A metal pail $1 (tag sale)
A gunmetal lamp $0 (belonged to my hubby from his bachelor days)
Nautical Artwork $26
Frames $0 had in inventory
Oar $10
Lights $0 (an old string we used on our patio)
Shower curtain fort $0 (had it in my inventory)
Toy storage for closet $ 15 for the plastic bins
Nautical Window Treatments $40
Sailboat $.50
TOTAL
$107.50
I show these details because it shows you that you can get the look for hardly anything. Yes, the furniture and bedding were a splurge, but the accessories don't have to break the bank too. You can find items around your house to pull the look together. You would be surprised what I can HUNT...
If you want to see some awesome ideas for a GIRLS ROOM, click
here.
I also have some great ideas for putting together an inexpensive bed on my
Tips and Tricks Tab
BEFORE
**TRICK
At first the thought of taking sheets on and off a bunk bed were enough to steer me in the other direction. Especially because Hayden still had frequent night time accidents. After washing his bedding 10 times in 2 weeks, I came up with a little TRICK to keep my sanity and not have to do 3 loads of laundry a day.
When dressing the bed place a square WET PAD down first.
Then I lay the FLAT SHEET over the wet pad and tuck the ends of the sheet under the mattress. That way I don't have to bump my head every time I strip or make the bed! PLUS--I don't have to wash a huge mattress pad, sheets and a comforter! Genius, if I say so myself...
I also fold the quilt half way down to where it hits at the feet. That way you get the "look" you want, but you don't have to wash the quilt/comforter every time your toddler has an accident. I use another (smaller) blanket to cover him at night.
This is a real SANITY SAVER if you little one is having a hard time learning to keep dry overnight.
To follow my projects and share my posts, join me on Facebook.
And as always, I love to hear from MY READERS! Please leave me comments, post projects you have tried and feel free to ask me questions.
If you enjoy reading HOUSE by Holly, please click the "like" button at the top of the page for Facebook. Or visit
http://www.facebook.com/HouseByHolly and hit "like". I will be sharing extra tips and tricks on that Facebook page I created. And as always, I love to hear from MY READERS! Please leave me comments, post projects you have tried and feel free to ask me questions.
From my HOUSE to your HOUSE, HAPPY HUNTING!
Holly
Linking to