Hi Readers,
This month has been busy, I recently shared our kitchen update which features our newly painted kitchen cabinets. A lot of work, but totally worth it in the end. Now on to bigger things..
I've always loved decorating for Christmas.
Who am I kidding? I've always loved decorating period. The thrill of my passion in both is finding ways to get the look I want without breaking the bank.
I thought this would be a great time to share how to decorate for Christmas.. like your house didn't trip over the North Pole.
This year I dragged 3 Christmas bins up from the basement only to find that I like about half of one bin. Seriously. You know the bins, the ones you take out once a year to fill your home with fluffy, red and green colored things that are shiny and covered in glitter.
They are mostly filled with things I have collected from as far back to fifteen years ago-- things my Mom handed down to me and a few things I have picked up at discount store chains. I have shared before that I'm not one to decorate like the Easter bunny vomited all over my house or to be taken over by the colors black and orange during the month of October. Rather just a touch here and there...
It must be from when I was a kid and I remember my Mom taking out huge bins for each big holiday and replacing everything she loved the rest of the year in those boxes so that she was able to display those holiday items without a lot of clutter. I never liked that. Taking away from the decor that you loved, putting it away only to be bombarded with the task of switching it all out again. Seemed like a lot of work. I also realize I may be weird ;)
So with that in mind, and also the fact that you could really spend a fortune on these decorations trying to out due whatever you did last year.. I am going to show you how to make your decorations for year round take you into Christmas.
Dining Room & Foyer:
The dining room is very important in my house. It's one of the first rooms you see when you come in.
It's also where I try to make everything fancy for the feast we have on Christmas Eve.
This is a place that I really like things to sparkle. But it doesn't have to cost a fortune! ;)
I use my existing china and crystal to start.
For my centerpiece, I trimmed some arborvitae branches to create a wreath and wrapped some thick ribbon from last year around it. I topped it with a glittered deer and tucked a few pine cones and a glittered flower to top it off.
Gathering my collection of mercury candle sticks and votives creates the sparkle...
I use these throughout the year, so putting them in one place or purchasing a few more isn't a big deal. These could be used 365 days of the year. See easy.
Some inexpensive faux shimmery poinsettias pulled off the stem and placed on top of the a mercury votive add a little texture and color to my masterpiece.
These could be glittered, gold, silver, red, green--whatever.
Next, I sprinkled a couple of large silver and gold ornaments to give some more shine to my tabletop.
I finally sold two sets of dining room chairs and settled on these chairs..I heart them!
My next trick is to place these gold snowflakes that I swear by on each dish. I have been using these inexpensive Walmart snowflakes for years! You can also hang them all over the house for a magical Christmas.
You can find the metallic gold trellis pillow at Target.
Kitchen:
This is easy too. This year I just put a boxwood bush out and called it a day. This boxwood creation can be used throughout the year, so no need to pack away once the holiday is over. Maybe some pine cones or ornaments in a bowl. Done.
I happened to find this great porcelain deer head at Target last year and against my cutting boards it looks magnificent.
Our old pie cabinet turned "craft closet" for the kids holds a tree wrapped in ribbon that I simply tucked silver glittered pine cones to finish it off.
I found the brass deer at a thrift store for a couple of dollars last year. Otherwise, I use the rest of the decorations year round.
Another great idea is to make or buy a chalkboard, write the days of December and hang a beautiful boxwood wreath framing your favorite word for the season. The kids could have fun taking turns marking out each day. Simple.
You can buy a boxwood here for $20.
Living Room:
I have had my tree skirt for about 6 years. I don't love it anymore and haven't for a couple of years. Last year I used an old curtain panel, this year I will use a drop cloth from Lowe's. Yes, you heard right. No one will ever know (except you!) and it lends just the right amount of muted texture that I want.
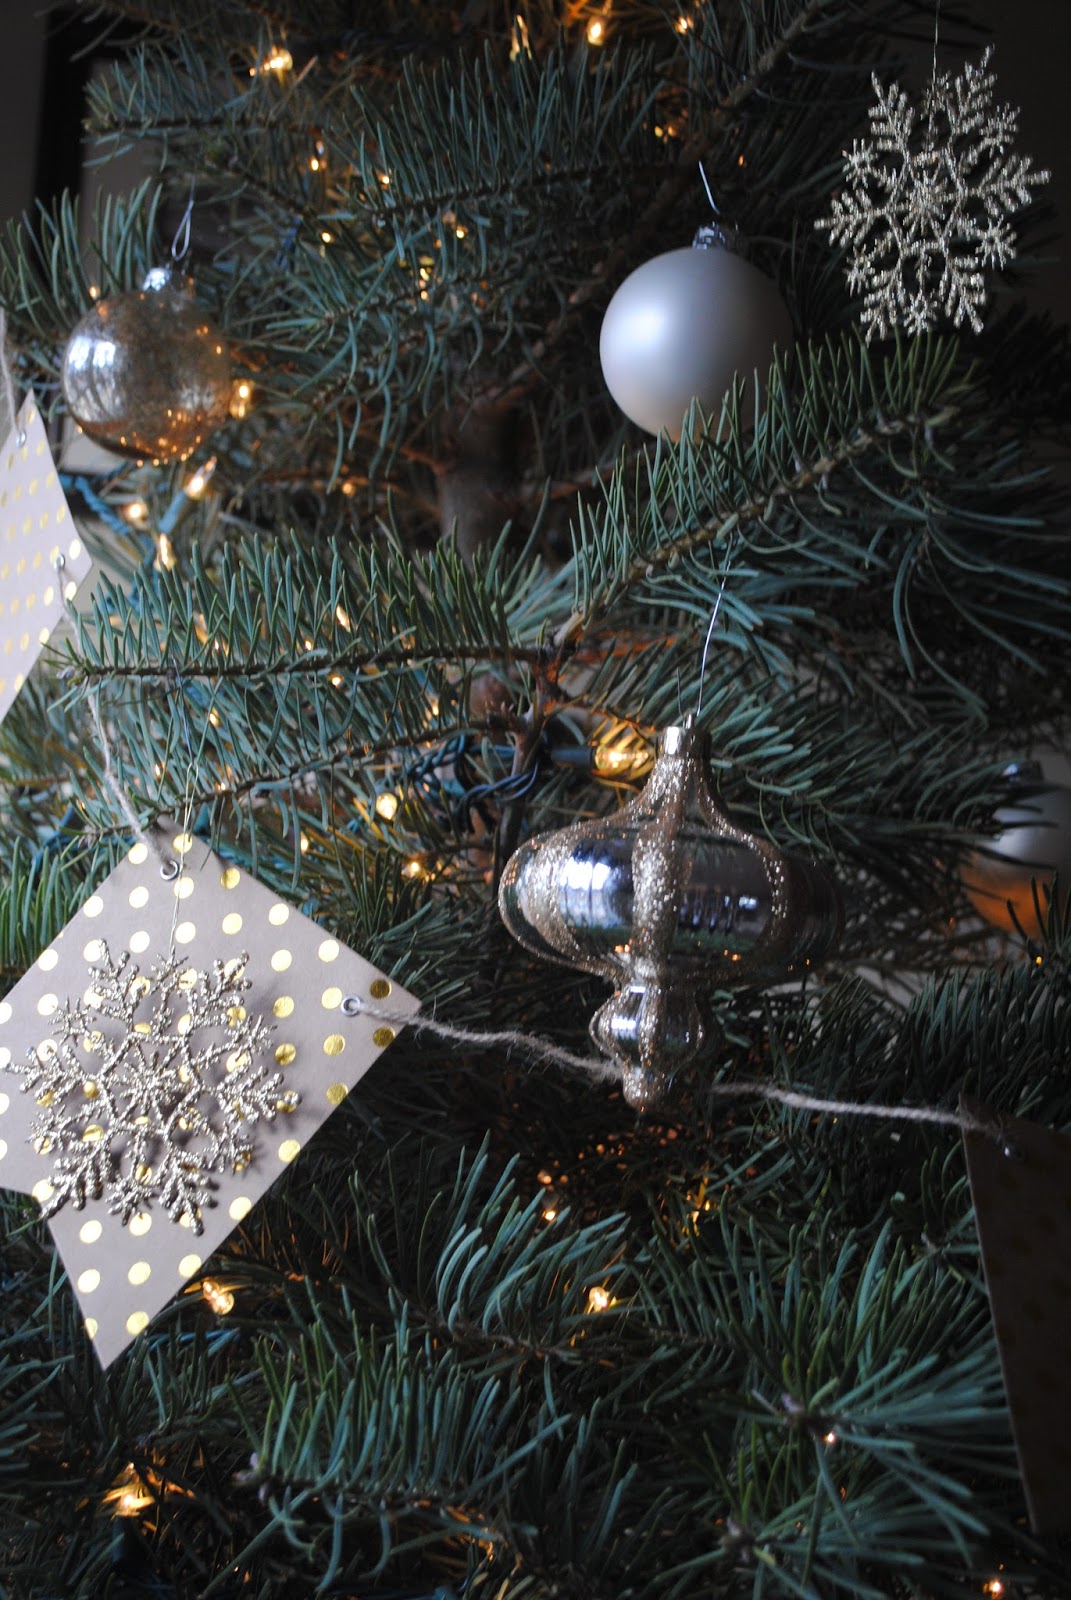
This year I am just using blue, cream and mercury ornaments. These are easy enough to buy in a bundle from Walmart or any other discount chain. Done.
I found this banner with gold polka dots in the craft isle at Walmart for less than $3. I purchased 4 and incorporated them on the mantle, tree and up our stairs. These could easily be used for another holiday or special day in your life.
There are some similar ones to chose from here.
The Mantle requires a little bit more care. Again, I gather some more mercury or glass candle sticks or votives and sprinkle them around. You can easily update the candles from a discount chain to unify them.
I found the silver bottle brush trees from Target and placed them in my existing large mercury votives to give them height.
I go out to my yard again and cut pieces off my arborvitaes to complete the look with garland. I also tucked pieces of greenery cut from the bottom of our tree in for a fuller look. Super simple and could save you tons of money. And I don't have to sit and bend the previous years garland hoping that it looks nice. Nothing is better than fresh greens.
I love the look of the paper banners..these are gorgeous and highlight the organic, shiny neutral look I am going for..
I tucked a couple of metallic faux flowers, glittered pine cones and large silver and gold ornaments on the garland. The outcome is beautiful.
So there you have it. Super inexpensive ideas on how to create simple, but elegant Christmas decor by using things you may already have and that don't break the bank.
Wishing you and yours the happiest of Holidays!
For more beautiful ideas you can view my decorations from previous years.
And of course, for some laughter and funny stories about keeping the BIGGEST secret ever! This is probably my favorite post ever and highlights the things we do to keep the Christmas magic alive!
Enjoy!
Linking to: Thrifty Decor Chick, A Stroll Thru Life
 Let's Connect!


 *Affiliate Links
UA-49484568-1