
Last month I shared our delicious creamy white cabinets. I chose Benjamin Moore's White Dove.

Now it's time to get down to the nitty gritty..
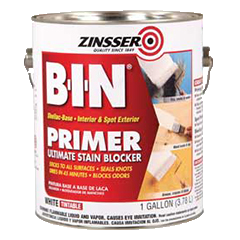
After much research and listening to my intuition these are the two products I swear by for this job.
Mr. House suggested I use a scrap piece of wood to test out the products I wanted to use. I did try two that were recommended and I didn't like them.
Then a light bulb went off-- I used the Zisserner Bin Primer for shellac on our Knotty Pine Paneling a few years ago and it has held up fantastic. It gave us a smooth finish and we still have no scratches and no flakes.
Then a light bulb went off-- I used the Zisserner Bin Primer for shellac on our Knotty Pine Paneling a few years ago and it has held up fantastic. It gave us a smooth finish and we still have no scratches and no flakes.
I decided to go with the same product with an ultimate stain blocker for our kitchen cabinets.
This primer dries very quickly and it does have a smell, so I would suggest opening the windows or wearing a mask. It's one of those paints that you get on and get out.

Benjamin Moore's Advance Paint is made specifically for kitchen cabinets.
Finally a product that has been created for this purpose! (*The crowd goes wild.)
It has a self leveling quality that will give you that smooth finish you are seeking. Many blog tutorials that I have read claim that they would use Benjamin Moore's Advance paint if they had to do it over again just because of that.

Painting Pyramids--These guys go under the four corners of the doors and drawer fronts for no smudging. An absolute necessity if you are planning to paint your cabinets. Otherwise you would get runs and smudges. Not fun.

My guy, Mike, at the Paint Spot, recommended these 4 and 6 inch Whizz Microfiber Rollers for a smooth clean finish. Look closely, they are not like the traditional roller you would normally use on walls. The threads are longer. I like the finish from these way more than foam rollers.

A 180 grit sandpaper to lightly take the sheen off of the cabinets. I did mine by hand, but you could use a sander.
Let's Get Started:
Here's a schedule I put together to keep your sanity and to give you a good idea of how long this project will take. I broke mine up by doing the island first waiting a few days, then doing the rest of the kitchen. In addition to the cabinets I painted a total of 27 doors and 12 drawers! Big project, but totally worth it.
Day 1-
1. Create a work space with tables and drop cloths. This can be outside or inside. I chose inside because it was raining.
 2. Remove all door and drawers. This will get moving once you get going. I used a cordless drill and kept a phillips screwdriver handy just in case.
3. Remove all hinges and knobs. I also used bowls to hold all the different hardware. Knobs in one, screws and hinges in another, etc. This kept me organized during the job and easy to get going in the end.

4. Wipe down cabinets, doors and drawers with a degreaser. Make sure you get off all the food splatters. They will show through the paint if you don't.
5. If you are changing your hardware and it doesn't fit in the existing holes, this is the time to plug the holes with wood putty. You will need to let this dry for a few hours and then follow with the next step.
6. Lightly sand all cabinets, doors and drawers. Just enough to knock the sheen off. Use this time to sand down any unsightly scratches or dents. When you are done it's very important to wipe the cabinets, doors and drawers with a tack cloth to insure a clean surface to paint.
7. Tape all areas off for a clean line. I taped the floor, under the countertop (where it meets the cabinet), back splash, oven, etc.
Day 2-
1. Position all the cabinet doors on their back side with the painting pyramids and open that can of primer paint . Use a paint brush first for the groves on the doors, drawers and cabinets.

Then follow up with the roller. I found that by using the brush first for what you need to do, then using the roller will hide the brush marks and give you a nice finish.
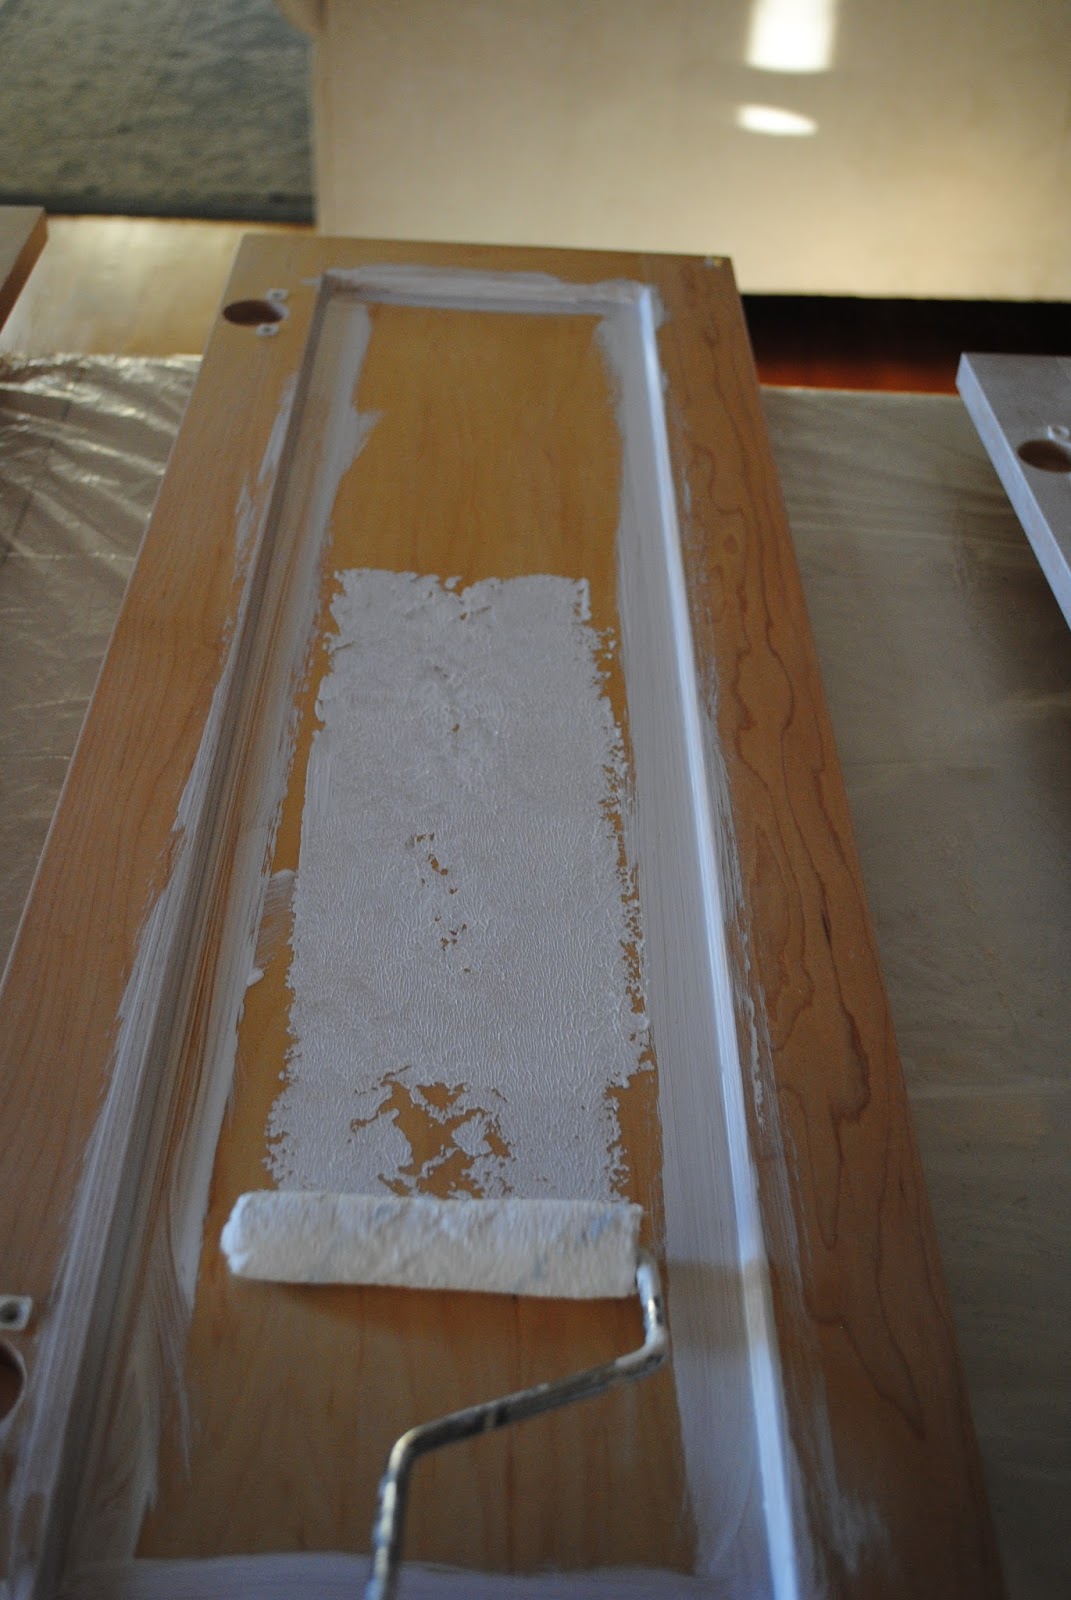
The cabinets, doors and drawers will get 2 light coats of primer paint. Once the doors are finished drying on the back side, flip them over and give 2 light coats on the front. If you notice any runs on any part of the cabinets, sand them once the paint is dry. This will dry for the rest of the day and over night.

Note: I started with the doors and drawers first, gave them all 1 coat and moved onto the rest of the cabinets. By the time you are done with that, you are ready to repeat for the second coat of primer.
Day 3-
1. Turn doors back on the back side and paint all cabinets, doors and drawers using the Benjamin Moore Advanced Paint. You will need to do only 2 light coats of this latex paint.
After a few hours of drying flip the doors back to the front and give them 2 light coats of latex paint as well. Then let all cabinets, doors and drawers dry for the rest of the day and overnight.
Note: The last thing you want to do is plop on thick coats of paint for this project. Take care to use the painting tray to squeeze off the excess paint. This is the step that will either make your cabinets look professionally done or like you did it yourself.


Day 4-
You are in the home stretch! Install all hinges and knobs back in the cabinets. If you plugged the holes for hardware, drill new ones and install new hardware.
Hang cabinet doors and drawers! This is when you really get excited at all that hard work you did and everything starts to come together.


With little bit of patience and time, you too can give your kitchen a whole new look!

What do you think?
From my house to your house, Happy Painting!

Let's Connect!


Linking to: Savvy Southern Style, Must Love Home
UA-49484568-1
They look wonderful Holly. I sent my daughter a pin so she could see how a person really can do a great job.
ReplyDeleteThis comment has been removed by the author.
ReplyDeleteAwesome paint job and a super tutorial. I have been thinking about painting my oak cabinets but have been afraid how they will look if I paint them white. Then I saw your kitchen! I have the exact backspash tile you do, black-ish granite counters and oak floors. Now I am excited because I think I know how my kitchen could look!! Thanks so much for sharing your project! I would love for you to share your project at Wonderful Wednesday at http://www.mustlovehome.com. We have 10 co-hosts for lots of exposure! Have a super day:)
ReplyDeleteThank You! I will!
DeleteI'd love to see a picture of your kitchen when you are done!
Good Luck!
Stunning!!! Great tutorial. I have been wanting to do this to my cabinets but haven't taken the plunge. I think you've inspired me.
ReplyDeleteDo it Stacy! A lot of work but totally worth it in the end! Keep me posted if you do.
DeleteGorgeous. Great job.
ReplyDeleteBeautiful!!! I love the transformation.
ReplyDeleteMy kitchen looks just like your before! I'm wanting to paint my cabinets too! I have two questions: On day 3, you say to "turn doors back on the back side"..... are you actually painting the BACK side first? Then turning them over and painting the FRONT?
ReplyDeleteQuestion 2: Does the BM Advance Paint come in different colors? I wanted to paint my cabinets the same as my trim color. Can a color be added to the Advance Paint??
I called my local paint store and found out that the BM Advance Paint can come in any color, and finish. So, I would like to know what finish you used on the cabinets. Thank you so much! This is the best tutorial I have seen on when/what to do when painting cabinets!
ReplyDeleteHi Linda,
DeleteYes, I painted the back first, turned over and then did the front. I did this because I wanted to make sure the fronts of the doors were absolutely perfect. Yes, you can have any brand/color mixed in BM Advanced. I chose the satin finish which in advanced paint is like a semi gloss. I'm so happy to hear you like the tutorial! I tried really hard to make it relatable :). Let me know if you have any more questions and I would love to see when you are finished. Just keep it day to day, take your time, and you will love your cabinets!! Good luck!
Kitchen cabinets
ReplyDeleteSooner or later, everybody wants to make some changes in their homes. Either it is the furniture you got tired of or the entire design needs a redo, even the smallest change will make you happy. Several years after carrying out some renovation works, buying beautiful furniture at that moment, you will definitely want a redo.
100 Old Cherokee Road, Suite F – 13
Lexington, SC 29072
kwkitchencabinets@yahoo.com
803-520-6545
Well, whole map of kitchen changed after getting repaired.I really love that kitchen looks. Soon I also going to make some changes in my kitchen by replacing old cabinets and already ordered some from "BuilderOutletUSA" store. I hope after repair work my kitchen also will get a great look.
ReplyDeleteYour kitchen makeover is so lovely and amazing
ReplyDeleteAbsolutely gorgeous. It is so beautiful. You did great job. thanks for sharing with us
ReplyDeleteWhat a beautiful transformation. It is so elegant, I love it!
ReplyDelete
ReplyDeleteThank you for sharing, we specialize in the design, construction, installation, repair of kitchen cabinets. Please refer to the information at
sửa chữa tủ bếp bị mọt
sửa chữa tủ bếp bị rớt nan cánh tủ
sửa chữa tủ bếp bị hỏng bàn lề cửa
thay phụ kiện tủ bếp
sửa chữa tủ bếp bị mối
sửa tủ bếp tại nhà
Kitchen cabinets mesa az. Hksarizona.com offer kitchen cabinets, kitchen sinks, bathroom vanities, range hoods etc at an affordable price. Call: (480) 912-5855. kitchen cabinets phoenix
ReplyDeletethis post is very nice and the above design of kitchen cabinet are too beautiful
ReplyDeletekitchen cabinet
Nice Blog.
ReplyDeleteYour site provides helpful information about Kitchen Cabinet.
Thanks for Sharing with us.
We are cabinet makers in Barrington have rich experience in modern kitchen cabinets, custom kitchen cabinets, vanity cabinets, kitchen wall cabinets, kitchen pantry cabinet in Barrington. We have full confidence to meet your special request for any material to finish.We also supply high-quality cabinet Material to meet your different grade project needs.With competitive rates and high-quality standard, we built stable Cabinets with the use of Latest & Trending Technologies. Our strength and continued success lies in our ability to finish special and complicated joinery works and has resulted in repeat business as well as recommendations.
kitchen cabinets Barrington
kitchen cabinet doors
white kitchen cabinets
cheap kitchen cabinets
kitchen cabinets for sale
kitchen cabinet refacing Barrington
kitchen cabinet design
kitchen cabinets wholesale
I have never seen this kind of blog before. this is such a helpful and very nice blog and it is not very complicated to understand.Thank you for sharing this post
ReplyDeleteKitchen Cabinet Fixtures Niagara
Very nice blog i have learned many things from this blog Kitchen Cabinet Fixture Niagara
ReplyDeleteThis is really interesting blog on Wooden Kitchen Cabinets manufacturers, You are a very skilled blogger. I've joined your rss feed and look forward to seeking more of your excellent post. Also, I've shared your web site in my social networks! Thank You!!!
ReplyDeleteThank you for sharing such a piece of wonderfull information .this is very useful for me.i also want to share some relevant information for your visitor
ReplyDeletethiết kế nội thất
bảng báo giá tủ bếp gỗ tự nhiên
tủ bếp gỗ tự nhiên
tủ bếp gỗ tự nhiên sơn trắng
yasaklı sitelere giriş
ReplyDeletepepsi kodları
wall hack kodu
ücretsiz antivirüs programları
yeni kimlik yenileme ücreti
internetsiz oyunlar
en hızlı dns sunucuları
bedava internet
Thanks for sharing the evolution of your new kitchen. We are about to embark on a huge remodeling on a new old house we are purchasing .
ReplyDeleteThe process involves Cabinet refacing Mississauga stripping the stain or paint from the existing cabinets and adding new stain, varnish or paint; in some cases, you might even want to refinish the cabinets with a stick-on veneer.
ReplyDeleteWOW, This set is very amazing. You might check into several polyester film manufacturer to overhaul your complete packaging system and give it a consistent look for your company. It comes at a very cheap price.
ReplyDeletegate
ReplyDeletebinance
coinbase mi binance mi
bitcoin
binance referans kimliği nedir
kripto para nasıl alınır
coin nasıl alınır
binance 20
tiktok jeton hilesi
modern cabinets A very awesome blog post. We are really grateful for your blog post. You will find a lot of approaches after visiting your post.
ReplyDeleteYou will find that a higher price range doesn't automatically imply superior quality, and some of the lesser-known cabinets are more durable than others. You can look at the wide range of collections of Kitchen Cabinets at Walcraft Cabinetry to have the best quality at a lower price range.
ReplyDeleteperde modelleri
ReplyDeleteNumara onay
mobil ödeme bozdurma
nft nasıl alınır
Ankara evden eve nakliyat
trafik sigortası
dedektör
web sitesi kurma
aşk kitapları
SMM PANEL
ReplyDeletesmm panel
iş ilanları
instagram takipçi satın al
hirdavatciburada.com
Https://www.beyazesyateknikservisi.com.tr/
SERVİS
TİKTOK PARA HİLESİ
yurtdışı kargo
ReplyDeletelisans satın al
minecraft premium
en son çıkan perde modelleri
özel ambulans
en son çıkan perde modelleri
nft nasıl alınır
uc satın al
Success Write content success. Thanks.
ReplyDeletebetmatik
betpark
kralbet
kıbrıs bahis siteleri
deneme bonusu
canlı poker siteleri
canlı slot siteleri
girne
ReplyDeletegölcük
görükle
güngören
izmit
P2J5T
salt likit
ReplyDeletesalt likit
İTKL
artvin
ReplyDeletebitlis
niğde
hatay
tunceli
8C78B
https://saglamproxy.com
ReplyDeletemetin2 proxy
proxy satın al
knight online proxy
mobil proxy satın al
4FX6EP
kasmalı oyunlar
ReplyDeleteresimli magnet
silivri çatı ustası
çerkezköy çatı ustası
referans kimliği nedir
KW82Mİ
مكافحة الحشرات بالاحساء SHtrOhRjyn
ReplyDeleteمكافحة الحشرات بالاحساء 0zJtEzeR4a
ReplyDeleteشركة عزل اسطح وخزانات بالرياض 6gSkJTsv3n
ReplyDeleteشركة عزل اسطح وخزانات بالرياض 5D00tzLRrc
ReplyDelete