Friday, December 28, 2012

A Year of Ideas! Cheers to my READERS!

I hope everyone had a Wonderful Holiday Season.  As we approach the years end, here 's a look back of some of my favorite posts from 2012. 

Hopefully, I have inspired you with MY IDEAS or you are thinking of contacting  me to give you some ideas for YOUR HOUSE.  Check out my CONTACT tab for details.
C'mon People, let's get YOUR HOUSE organized and decorated on a dime this year!


First up, my most popular post,  "How to embellish a GIRLS ROOM for under $40".  This post was featured on many blogs and I appreciate the "shout outs".
          A how to for lots of ideas to embellish a girls room using things around your house.


I had a blast revamping our LIVING ROOM on a random Saturday..."Hitting it from all angles!"
A $5 bureau inspired the look of our family room.


Do you long for a shiny black FRONT DOOR?  I finally got mine!  And it wasn't rocket science...
                            Our tutorial on how to get a shiny black front door -- No oil paint needed!


My very first post is about the DESK I found on the side of the road.  This desk turned my house upside down and inspired me to start my blog, House by Holly. 
I think my neighbor is finally convinced I am not crazy for making her help me drag this piece home on our morning walk.  Click here for the crazy.


A mini closet turned MUDROOM has kept our family organized.  You gotta work with what ya got people!
                        For lots of ideas for working with a small closet and cramming it all in.


What does a mother of two do for fun?

You'll have to read my hilarious adventure in thrifting with two kids and a very small car to check out this lamp redo. 


A LITTLE BOYS room fit for a Prince, or a Sailor!
Also a "feature favorite". My sons nautical inspired room has so many ideas on inexpensive ideas to keep your little man ENTERTAINED and ORGANIZED.


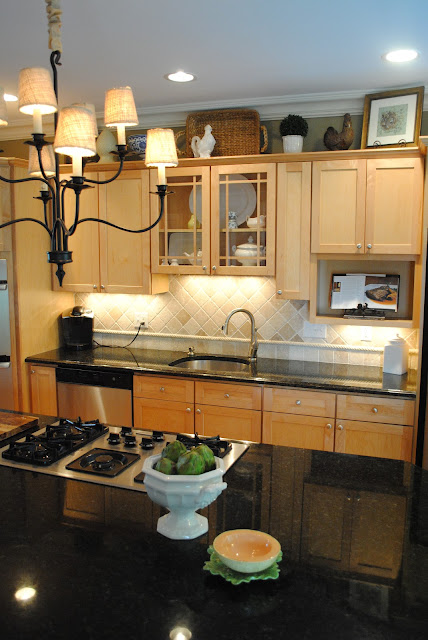
We all know the KITCHEN is where the heart of your home is.  
Mine has a Pottery Barn inspired chandelier for a fraction of the cost. 


Never underestimate the power of SPRAY PAINT!  
Nothing is safe from my "Spray Painting Season".   Too many subjects to count!  Including a coo coo clock, lamps and some terra cotta finials.  Truly, I have spray painted just about anything.


And last, but certainly not least.  I have showed you how to make at least 25 NECKLACES using the jewelry you already have in your jewelry boxes.  
This ain't your Grandmas pearls!
My DIY jewlery is an eye opener to get the look for less!


2012 was a great year for me. I took a leap of faith and started my blog, House by Holly.  If you would have told me 2 years ago that I would have a blog with over 40, 000 hits in the first year, I would have said, "Dude, whatever..."

So THANK YOU to my readers!!!  

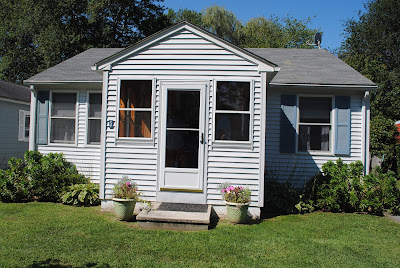
I can't wait to see what 2013 will bring. Keep your eyes peeled for that little beach house we bought in September, it's going to be so much fun to decorate.  And do I have some great ideas! 
Click  to see the progress.


Wishing you a Happy New Year Readers! 


From my HOUSE to your HOUSE, HAPPY HUNTING!

Holly


To follow my posts, join me on Facebook.
http://www.facebook.com/HouseByHolly

You can also follow me on HOUZZ.COM and Pinterest.

If you enjoy reading HOUSE by Holly, please click the "like" button at the top of the page for Facebook. Or visit http://www.facebook.com/HouseByHolly and hit "like".  I will be sharing extra tips and tricks on that Facebook page I created.  And as always, I love to hear from MY READERS!  Please leave me comments, post projects you have tried and feel free to ask me questions.

Linking to:


Tuesday, December 11, 2012

Deck The Halls with Boughs of Holly...

Fa la la la la la la la la!

Christmas is full of TRADITIONS...

Whether you cut down your tree or use a faux one, decorating it as a family, is a simple tradition that means so much.  I have to admit,  I used to be a little OCD and longed to decorate the tree by myself making it just perfect.  Everything glorious and hanging just right.  Ahhhhhhh.

It has taken a few years to let go and I have to say the kids have been hanging all the ornaments for a couple of years.  Except for the top of the tree...they're too short! Ha!


It seems like the perfect compromise.  I think this years Christmas tree is the most beautiful we've ever had.


Our Christmas crafts include putting together our gingerbread house and making magic reindeer food.  A trip to the mall and a trip on the North Pole Express satisfies all for a quick glimpse of the jolly man with a beard.


Don't forget to take out the elf!  Ours is named Motainus and he ensures perfect behavior for the month of December. Well, almost perfect behavior.


And if it snows, even better.  A white Christmas is magical.

Decorating our home is what keeps the spirit going.  For the entire month of December, I appreciate the MOMENTS around the house like these...


A few weeks ago, I found this little treasure while thrifting...


A clock dome turned cloche with metallic ornaments and glittered silver candlesticks...


Our Christmas tree adorned with our childhood ornaments and a few baubles mixed in between. 


Click here to see our living room redo over the summer.


My daughter's beloved Nutcrackers...
don't look too close, you will see the arms are missing on one!


Do you spy Motainus? 


I trim the bottom of the tree to get extra branches for the mantle, tucking here and there...


 And I love that I am able to carry my BOXWOOD OBSESSION into Christmas with this preserved wreath from Lowes.


No chandelier is safe from the SNOWFLAKE MANIA!

You won't believe the full kitchen makeover.


This is a super easy idea to display all your Holiday cards.  

Click here to see our foyer closet turned mudroom.


My Boys are feeling the Christmas spirit too!


How do you decorate for the Holidays?  What are your traditions? 

From my HOUSE to your HOUSE, HAPPY HOLIDAYS!

Holly

If you enjoy reading HOUSE by Holly, please click the "like" button at the top of the page for Facebook. Or visit http://www.facebook.com/HouseByHolly and hit "like".  I will be sharing extra tips and tricks on that Facebook page I created.  

And as always, I love to hear from MY READERS!  Please leave me comments, post projects you have tried and feel free to ask me questions.

You can also follow me on HOUZZ.COM and Pinterest.


Friday, November 16, 2012

To Paint Knotty Pine or Not Paint Knotty Pine? That is the Question.

For all those  "not so" knotty pine people...

It's been a few weeks since the hubby and I have started painting the knotty pine.  After many coats of paint and many hours of work, WE DID IT!  

I am here to report, you can do it too and this is how.

Did I mention I loathe knotty pine?

My hubs found this video from HGTV on how to paint the knotty pine.  Go Hubs!

I went into the local Benjamin Moore store and requested a shallec primer just like the video suggests.  I'm sure you can get a similar product from Lowes or most paint shops.

Since the knotty pine has a coat of polyurethane on it, this primer is essential to act as a barrier for the latex paint.  Without the primer, the paint wouldn't stick and the knots would bleed through the paint. Nothing would be worse, than spending all this money, chosing not to do a primer, and the paint just peeling off.  Could you imagine?


This is the latex paint that I chose to cover the primer --Chantilly Lace in a pearl finish.  The pearl finish is much like a semi gloss, but a cheaper version. The same look for less.   If I opted for the more expensive paint in a semi gloss, I would have paid $15 more a can.  I knew this job was going to be expensive to begin with, so it was a "no brainer" for me...
Just because these guys want to sell you the expensive stuff, doesn't mean you have to get it.  Do your homework people!

This wood was thirsty, and I mean thirsty.  All in, it was 4 coats of paint.  2 coats of primer and 2 coats of latex paint.
The living room was the starting point.

We went from this...
To this... 
The Paint Specialist instructed me to cover all the knots with the primer first.  This keeps the knots from bleeding through once you put your first coat of primer on.  The primer dries very quickly and is very thin, so although it was an extra step, it wasn't too bad.

To this...
The window, door and ceiling mouldings also will be done in the Chantilly Lace.

I will paint the insides of the window once the warmer weather comes back around in the Spring.  We will also be adding a 3 inch floor moulding.
My hubs wanted to replace the existing doors, but I felt like the doors had great bones and they even still had the original glass knobs on them.  Hey, a little bit of vintage!  (I just gave you a hint of my theme.)  The doors were also given a little coat of Chantilly and I still feel like I made a good choice.  

By the way, look whats underneath the carpet!  Not in perfect condition, but a score none-the-less.  We decided to have all the floors refinished and give them a new life.

I will take this updated, easy living, version of knotty pine paneling any day.


What a difference a coat of paint makes, huh?  Well, maybe 4 coats of paint...


Dark and dreary to light and airy, just my style!

I will admit, taking this road was a commitment.  There were times I wondered if we would ever finish and thought I could not possibly paint any more.  BUT you can do it and it's definitely worth it.

Stay tuned for our kitchen update.  This little cottage is also getting a NEW fabulous kitchen. PLUS much, much more.  You won't want to miss the kids room and some special projects for the master and bathroom/laundry room.  Follow me on facebook @ http://www.facebook.com/HouseByHolly


***And the full tour of The Beach Bunker is up!!

Five inexpensive ways to update an out-of-date home

1) Paint; just by painting the walls, you are adding an instant update.  

2) Floors; if your home has some hardwood floors, it is a pretty safe bet, the whole house has wood floors (Score!) Lift up that carpet and take a peek...If not, you can always add Pergo floors and ask some family/friends to help out with the installation.

3) Kitchen Cabinets; most of the time, you can paint kitchen cabinets and change out the hardware for a quick update.  I also like to remove cabinet doors and paint the inside of the cabinets for a modern look.  
  
4) Mouldings; By painting doors, their mouldings and window sills you can add a custom look.

5)  Bathroom; An easy way to update a bathroom is by changing out the mirror and the shower curtain.  You can also change out the towel hangers and toilet paper holder.

What do you think?  Do you have a knotty pine project you want to tackle?  Do you now have the courage?  Are you knotty? (Get it? Yes, I went there) ;)


To follow our progress and share my posts, join me on Facebook.


From my HOUSE to your HOUSE, HAPPY HUNTING!

 photo SignatureStamp_zpscbc3c056.jpg
 photo pinterest_zpsce3157c2.png  photo facebook_zps6e141a1a.png  photo email_zps02408533.png  photo youtube_zps504f1e67.png

If you enjoy reading HOUSE by Holly, please click the "like" button at the top of the page for Facebook. Or visit http://www.facebook.com/HouseByHolly and hit "like".  I will be sharing extra tips and tricks on that Facebook page I created.  And as always, I love to hear from MY READERS!  Please leave me comments, post projects you have tried and feel free to ask me questions.


Linking to:


Wednesday, October 24, 2012

A Diamond in the Rough...

It's official!

My husband and I just purchased a little cottage near the beach.  We are very excited, but we have a lot of work ahead of us.  First thing to tackle is all the knotty pine paneling.  

Over the next few weeks I will be sharing how you can accomplish painting paneling the right way and just what that entails.  

Here's a look at the house by the water--


As you walk into the house, the first room is a mudroom complete with a built in storage bench.  

The kitchen will be gutted and replaced with beautiful cabinets and granite.

The ceilings are a keeper!

Beach livin' is all-right with me!


Did I mention we have to paint 5 rooms of knotty pine??!!
I chose Chantilly lace by Benjamin Moore and I can't wait to show you the progress!

We'll take it!  
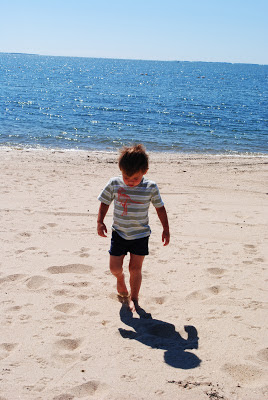
The little man approves.

We are looking forward to many years of fun spending time with our family and friends.  


To follow our progress and share my posts, join me on Facebook.


And as always, I love to hear from MY READERS!  Please leave me comments, post projects you have tried and feel free to ask me questions.


From my HOUSE to your HOUSE, HAPPY HUNTING!

Holly


If you enjoy reading HOUSE by Holly, please click the "like" button at the top of the page for Facebook. Or visit http://www.facebook.com/HouseByHolly and hit "like".  I will be sharing extra tips and tricks on that Facebook page I created.  And as always, I love to hear from MY READERS!  Please leave me comments, post projects you have tried and feel free to ask me questions.


Monday, October 22, 2012

Homemade by Holly

Giddy-Up, Birthday Girl!


When my daughter said she wanted to ride horses for her birthday this year, it all sounded so good.  I quickly got right to work, checking my favorite "go to"--Pinterest.  
(Don't you just love Pinterest?!)

I got some great ideas for a Horse themed party and came up with a few ideas of my own.  

The inspiration was endless.  
Google Image Result for http://goodell.smugmug.com/Hobbies/Baked-Goods/i-JhpRFJT/0/M/adobeols-M.jpg
Horse Cupcakes

How to make carrot party favors...cute for Easter, horse, farm parties
Carrot Party Favors

Horse party
Using Play Horses

chalkboard
Chalkboard Paint Platter

So these ideas were a great starting point and now I had to put my own spin on them. 


First up, those beautiful cupcakes-

 Now,  I would love to trace a silhouette of a horse on wax paper with melted chocolate in a icing bag, but that's just NOT going to happen. Tracing some 30 + said chocolate horses...yeah right.   

My spin includes vanilla cupcakes, light pink frosting dusted with a pinch of coconut topped with a mini plastic horse.  I decided to mix in some store bought chocolate cupcakes for interest.


Party Favors-

The carrot party favor with the surprise swizzle stick lollipop is no doubt adorable.  I happened to have orange and light green  tissue paper on hand and decided to try that instead of the the napkin and tulle.  

The end result:  just as adorable tied with a grosgrain ribbon

I ransacked the house for all the kids play horses and some mason jars.  Nice little touches for easy decorations....


Embellishing the Mason jars with grosgrain ribbon gave just the little touch the jars needed.  

Look how cute that Parmesan shaker is!
  
I absolutely love the silver platter with chalkboard paint and I could see this being used for multiple occasions.  
Placed on a  small plate easel it speaks to your guests...

And heck, while I got the chalkboard paint out, I can think of a few other things I'd like to paint.  Place card holders and gift tags all became my subjects, for my words.  
What says an outside Fall party more than apple cider and apple cider doughnuts? 
That's a given... 

I placed the drink dispenser on a plant stand and it was a perfect fit.  
Bonus:  the lower tray is a place to hold the cups!


With a little bit of imagination, some inspiration and a little bit of homemade, you can have a party any little girl would love.

Happy 6th Birthday My Darling Hannah Ryan!


And some highlights from the day...


And don't forget the horse pinata...

He didn't last long after this "crew" got to him!


To follow my projects and share my posts, join me on Facebook.


And as always, I love to hear from MY READERS!  Please leave me comments, post projects you have tried and feel free to ask me questions.


From my HOUSE to your HOUSE, HAPPY HUNTING!

Holly


If you enjoy reading HOUSE by Holly, please click the "like" button at the top of the page for Facebook. Or visit http://www.facebook.com/HouseByHolly and hit "like".  I will be sharing extra tips and tricks on that Facebook page I created.  And as always, I love to hear from MY READERS!  Please leave me comments, post projects you have tried and feel free to ask me questions.


Linking to:
Savvy Southern Style
The Shabby Nest